
How to Shoot a Recurve Bow: A Beginner's Guide
How to shoot a recurve bow as a beginner: safety, draw weight, split-finger vs three-under hooks, anchors, the shot step by step, with or without sights.

By Archery Insider Editorial Team
· 11 min read

In this article
A recurve bow is where most archers start: simple, quiet and satisfying to shoot. It has no sights or release aid unless you add them, so how you hold the string, where you anchor and how you let go make all the difference. Learning those recurve-specific details early saves months of frustration.
This guide is a recurve starter. It covers safety and draw weight, how to hold the string, where to anchor, a condensed version of the shot, shooting with or without a sight, a plan for your first sessions and the most common faults. For the full step-by-step technique, see our 11 steps of archery form, and for every aiming method, our aiming guide.
Before you shoot
Safety first
Only shoot at a proper range or a safe, legal backyard setup with a backstop, and only when the area behind the target is clear. Learn the basic rules and whistle commands in our range safety guide. Never draw a bow without an arrow, and never point it at anything you don't intend to shoot.
Start light
A light draw weight lets you learn good form without straining. A bow that's too heavy causes shaking, a collapsing anchor and bad habits. Our first recurve guide explains how to choose a starting draw weight, and our Samick Sage review covers a popular beginner bow.
Right-handed or left-handed?
Recurves come in right-hand and left-hand versions. Most archers choose by their dominant eye as well as their dominant hand; our aiming guide explains how to check eye dominance.
String and check the bow
String your recurve with a bow stringer, never by stepping through or bending it by hand; our stringing guide shows how. Then check the brace height (see our brace height guide), that the limbs are seated and straight, and that the string and nocking point are in good condition. Our parts of a recurve bow explains the terms.
Protect your arm and fingers
An arm guard protects your forearm from the string; a finger tab or glove protects your fingers and gives a smoother release. Our arm guard, finger tab and glove guide explains which to choose.
Nock the arrow
Place the arrow on the rest (or shelf) and clip the nock onto the string at the nocking point. USA Archery's beginner checklist says "the index vane is pointing away out or away from the riser." You should hear or feel the nock click onto the string.
Choose your hook: split finger or three under
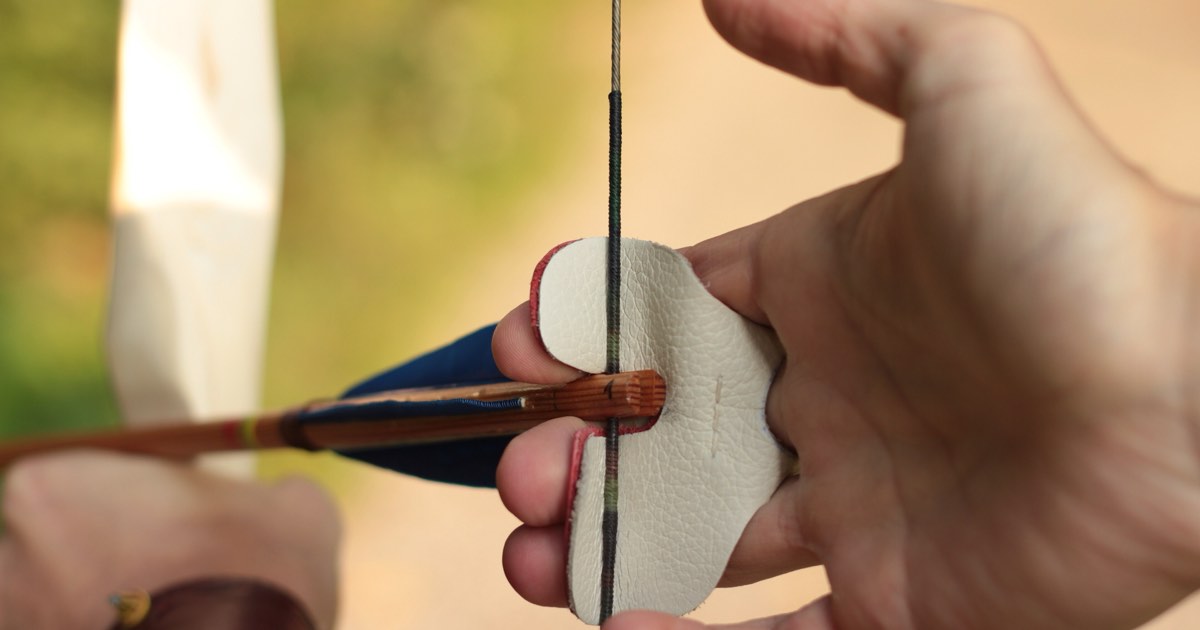
How you hold the string is called your hook. There are two common choices.
Split finger
3Rivers Archery describes split finger as "placing the index finger above the nock, while the middle and ring fingers are below the nock." It's the hook most Olympic-style recurve archers use, and it suits longer distances. 3Rivers notes that beginners can pinch the nock with this hook, pulling the arrow off the rest.
Three under
Three under means "placing three fingers under the nock of the arrow." 3Rivers says it suits closer ranges and string walking and is "a bit easier to learn." USA Archery's beginner checklist uses a three-under hook: "Index, middle and ring fingertips are curled around the string below the nocking point." It also puts the arrow closer to your eye, which some archers find helpful for aiming without a sight.
How deep?
3Rivers suggests placing the string "just in front of the first joint approximately 90° to the string." Archery 360 adds that a shallow hook "offers a quicker release that feels cleaner" but can add tension, while a deep hook ("between the fingers' distal and proximal joints") "promotes a more relaxed string grip." Try both and choose what lets you release cleanly.
Shooting off the shelf vs from a rest
Many traditional recurves are shot directly off the shelf; others use a stick-on rest or a rest and plunger. Our arrow rests guide explains each option. Shelf shooting is simple and quiet, and is common with feather fletching.
The recurve shot, condensed
This is a short version; our 11-step form guide explains each step in detail.
- Stance. USA Archery: "Straddle the shooting line." 3Rivers suggests you "start by facing 90° to the target with your feet set and spaced shoulder width apart."
- Grip. USA Archery: "The grip on the bow is loose and the knuckles are at a 45 degree angle to the bow." Let the bow rest in the web of your hand rather than squeezing it.
- Hook. Set your fingers on the string before you raise the bow.
- Raise and draw. Lift the bow towards the target and draw the string straight back towards your face, using your back muscles, not just your arm.
- Anchor. Bring your draw hand to the same place on your face every time.
- Aim. Settle on the target. USA Archery: "The focus is equally on the arrow point and the target."
- Release. USA Archery: "Relax the fingertips and allow the string to roll off the fingers." Texas Parks and Wildlife adds that "all three fingers should let go smoothly and at the same time."
- Follow through. Keep your bow arm up and your draw hand moving back along your face. Texas Parks and Wildlife: "The bow arm should remain pointing at the target after the release."
Drawing with your back, not your arm
A recurve gets heavier the further you draw it, and there's no let-off at full draw. If you pull with your arm and shoulder alone, you'll tire quickly and your anchor will creep. Instead, think of drawing your elbow back and round, using the muscles between your shoulder blades. Archery 360's guide to drawing describes how the path of the draw and the depth of your hook both affect tension in the hand; the aim is a draw that leaves your fingers relaxed enough to release cleanly. Keep your bow shoulder low and relaxed throughout.
Breathing and timing
Many coaches teach a simple breathing pattern: breathe in as you raise the bow, partly out as you draw, and hold steady at anchor while you aim and release. Just as important is timing. Holding a recurve at full draw for too long tires you and makes the bow shake, so aim to release within a few seconds of settling at anchor. If the shot doesn't feel right, let down slowly and start again.
Where to anchor on a recurve
Your anchor is the point on your face where your draw hand settles at full draw. Texas Parks and Wildlife says it "should be the same place every time you shoot." 3Rivers recommends "a minimum of two reference points (preferably hard bone) for repeatability."
- Corner of the mouth: USA Archery's beginner checklist says "the index finger of the draw hand is settled in the corner of the mouth." This is common for beginners and for shooting without a sight.
- Under the chin: the draw hand sits under the jaw, with the string touching the chin and nose. It is often used with a sight in Olympic-style archery.
Whichever you choose, consistency matters most. 3Rivers puts it simply: "Consistency sums up most everything in archery."
Shooting without sights
Most beginner recurves are shot without a sight. The two main approaches are:
- Instinctive: you focus hard on a small spot on the target and let your brain coordinate the shot, much like throwing a ball.
- Gap shooting: you use the arrow point as a reference and learn how far above or below the spot to hold at each distance. 3Rivers describes gap shooting around a "point-on" distance.
3Rivers also describes string walking and face walking, which change where you hold the string or anchor to adjust for distance. Our aiming guide explains all of these, and our barebow guide covers competitive sightless shooting.
Shooting with a sight
Adding a sight turns your recurve into an Olympic-style setup: you set the sight for each distance and aim with the aperture. It's easier to group tightly at longer distances, but your form and anchor still have to be consistent. Many archers who add a sight also move to a split-finger hook and an under-chin anchor.
Your first five sessions
- Session 1: learn safety, stringing, nocking and the basic shot at about 5 to 10 yards, at a large target or blank bale. Shoot a few arrows at a time, with rests.
- Session 2: focus on a consistent anchor and a relaxed release. Ignore where arrows land.
- Session 3: add a target face at close range and aim for groups, not bull's-eyes.
- Session 4: move back a few yards once your groups are consistent.
- Session 5: try a short scoring round for fun and note what goes wrong when you tire.
Keep sessions short; tired muscles make bad habits. Our practice plan gives drills and a weekly routine.
Common recurve faults and fixes
| Fault | What happens | Fix |
|---|---|---|
| Plucking | Hand pulls away from the face on release; arrows go left (right-handed) | Relax the fingers and let the hand move back along the face |
| Collapsing | Draw creeps forward before release; arrows hit low | Keep pulling with your back through the release |
| Gripping the bow | Bow twists in the hand; arrows go left and right | Keep a loose grip, knuckles at about 45° |
| Canting | Tilting the bow; arrows drift sideways at distance | Keep the bow upright, or tilt the same amount every shot |
| Peeking | Dropping the bow arm to watch the arrow; arrows go low | Hold your follow-through until the arrow lands |
| Pinching the nock | Arrow falls off the rest during the draw | Relax the hook or try three under |
| Inconsistent anchor | Groups spread up and down | Use two reference points every shot |
If faults persist, or you start flinching or freezing before release, read our guide to target panic.
Left-handed archers
If you shoot left-handed, buy a left-handed bow: the sight window, shelf and rest are on the opposite side. Everything in this guide applies in mirror image, including the direction of faults in the table above (plucking sends a left-hander's arrows right, for example).
How to tell your form is improving
Score isn't the best measure at first. Look instead for:
- Smaller groups, wherever they land on the target.
- A repeatable anchor you can feel without thinking.
- A clean release, where your draw hand moves back along your face.
- A steady follow-through, with the bow arm still pointing at the target.
- Less fatigue across a session.
Filming yourself from the side and from behind is one of the most useful tools for spotting form problems you can't feel.
Hunting with a recurve
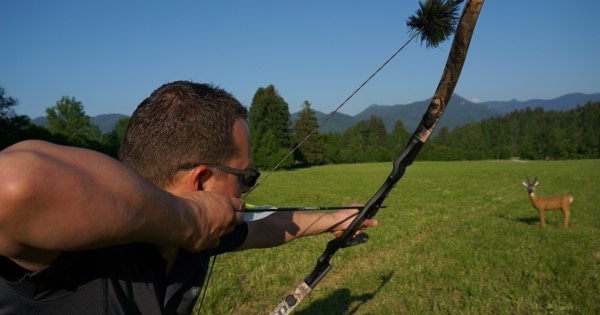
Many bowhunters use recurves, but hunting asks more of you: an ethical draw weight, broadheads that fly well, and accuracy from awkward positions at real hunting distances. Practise sitting, kneeling and from an elevated position, keep shots close, and check your state's legal minimum draw weight. Our draw weight guide and beginner's guide to bowhunting deer explain the requirements.
When to get coaching
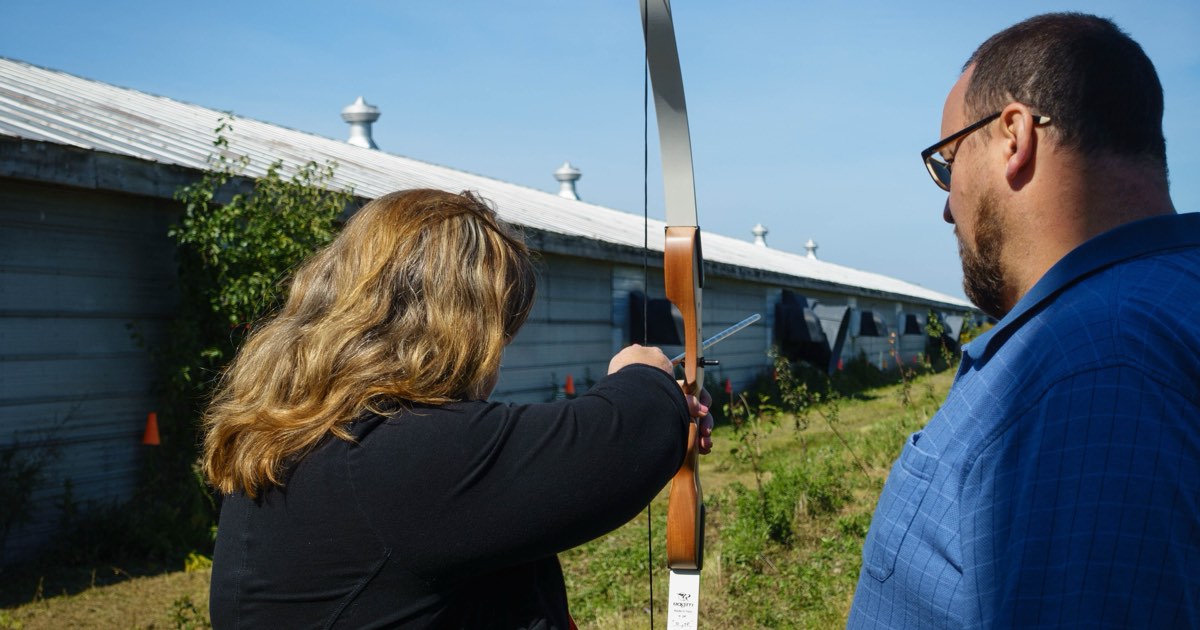
A good coach will spot problems you can't feel. USA Archery's Explore Archery programme, local clubs and many archery shops offer beginner sessions. Even one or two lessons early on can save you from building bad habits.
Learning on a recurve
Advantages
- Simple equipment that teaches good form
- Quiet and affordable
- Grows with you: add a sight, plunger or heavier limbs later
Trade-offs
- Finger release takes time to master
- Full draw weight held at anchor (no let-off)
- Inconsistent form shows up clearly on the target
You can browse beginner takedown recurves or archery finger tabs on Amazon.
Frequently asked questions
How do you shoot a recurve bow for the first time?
String the bow safely, put on an arm guard and tab, nock an arrow, stand side-on to a close target, draw to a consistent anchor and release by relaxing your fingers. A coach or club session is the best start.
Should I use split finger or three under?
Three under is easier to learn and suits shooting without a sight; split finger is standard for Olympic-style shooting with a sight.
How do you shoot a recurve bow without sights?
Use instinctive aiming, gap shooting or string walking. Our aiming guide explains each.
Can you shoot a recurve off the shelf?
Yes, if the bow has a shelf. Many traditional archers do.
What draw weight should a beginner recurve be?
Light enough to draw and hold without strain. Our first recurve guide explains how to choose.
Where should I anchor with a recurve?
Somewhere repeatable with at least two reference points, such as the index finger at the corner of the mouth.
How far should a beginner shoot?
Start at about 5 to 10 yards and move back only when your groups are consistent.
Why do my arrows go left when I shoot a recurve?
For a right-handed archer, common causes are plucking the string, gripping the bow too tightly, or the string hitting the arm guard. Check your release and grip first.
How long should I hold at full draw?
Only a few seconds. If the shot doesn't feel right, let down slowly and start again rather than holding until you shake.
Related articles
 Training
Archery Form: 11 Steps to a Consistent Shot
Archery form step by step: stance, hook and grip, set-up, draw, anchor, transfer, aiming, release and follow-through, plus common faults and fixes.
Updated March 21, 2025 · 10 min read
 Training
How to Aim a Bow: Sights, Gap and Instinctive
How to aim a bow: eye dominance, anchor points, sights, gap shooting, string walking, face walking and instinctive aiming, with practice drills for each.
October 7, 2026 · 11 min read
 Guides
How to Choose Your First Recurve Bow: A Beginner's Guide
How to choose a first recurve bow: takedown vs one-piece, draw weight, bow length for your draw length, riser types, eye dominance, and essential accessories.
Updated February 6, 2025 · 11 min read