
Archery Form: 11 Steps to a Consistent Shot
Archery form step by step: stance, hook and grip, set-up, draw, anchor, transfer, aiming, release and follow-through, plus common faults and fixes.
By Archery Insider Editorial Team
· · 10 min read
In this article
Accuracy in archery is not about aiming harder. It comes from doing exactly the same thing on every shot, so that the only thing that changes is where you point the bow. Coaches call that sequence the shot cycle or steps of shooting, and every successful archer has one.
This guide breaks the shot into eleven steps, based on the National Training System (NTS) that USA Archery coaches teach and that school programmes such as NASP use in a simplified form. It applies to recurve and, with a few changes noted along the way, to compound bows.
Why a shot sequence matters
Every arrow you shoot is the result of dozens of small movements. If any of them change from shot to shot, the arrow goes somewhere different. A fixed sequence lets you repeat the movements, practise them one at a time, and diagnose what went wrong when an arrow misses.
It also gives your mind something to do. Archers who think about the steps of the shot, rather than about hitting the gold, shoot more consistently under pressure. That is the main defence against target panic.
The 11 steps at a glance
| Step | What happens | Key point |
|---|---|---|
| 1. Stance | Feet set across the shooting line | Same foot position every shot |
| 2. Nock | Arrow clipped onto the string | Index vane out, arrow on the rest |
| 3. Hook and grip | Fingers on the string, hand on the bow | Deep hook, relaxed grip |
| 4. Set | Body posture set before lifting | Head turned to the target, shoulders down |
| 5. Set-up | Bow raised toward the target | Bow arm up, string partly pre-drawn |
| 6. Draw | String pulled back to the face | Back muscles, smooth and straight |
| 7. Anchor | Hand settles on the face | Same contact points every time |
| 8. Transfer | Load moves to the back muscles | Elbow moves slightly behind the arrow |
| 9. Expand and aim | Aim settles while tension continues | Keep pulling through the aim |
| 10. Release | String leaves the fingers | Relax the fingers; do not open them |
| 11. Follow-through and feedback | Hold the finish, review the shot | Stay in position until the arrow lands |
Step 1: Stance
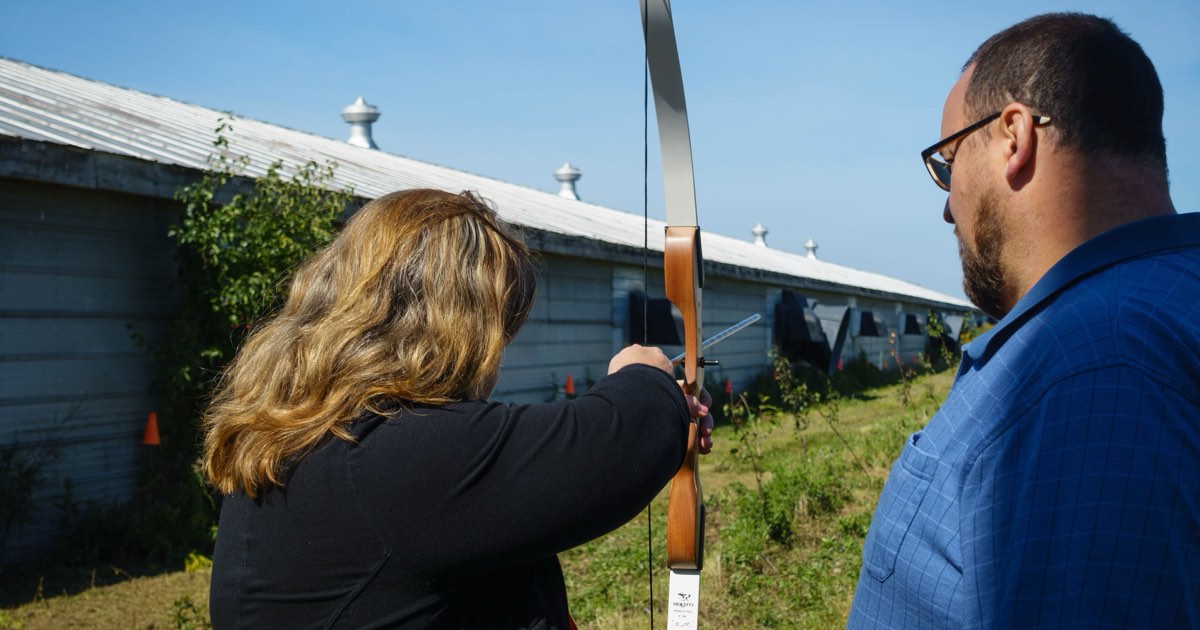
Stand across the shooting line with your feet about shoulder-width apart and your weight evenly balanced.
- Square stance: toes on an imaginary line pointing at the target. Simple and easy to repeat; most beginners start here.
- Open stance: the front foot (bow side) drawn back slightly and turned toward the target. NTS teaches a slightly open stance, with the front foot a couple of inches behind the rear foot. It gives a more stable base and more string clearance from the chest.
Mark your foot positions with tape or tees when practising, and stand in exactly the same place every end.
Common fault: leaning back or forward. Your weight should be balanced over the middle of your feet, with your hips under your shoulders.
Step 2: Nock the arrow
Hold the bow pointed at the ground in front of you, place the arrow on the rest, and clip the nock onto the string just below the nocking point. You should hear a light click.
- The index vane (usually a different colour) points away from the bow for most recurve set-ups.
- Check the arrow is sitting on the rest, not on the shelf below it.
Only nock on the shooting line, and only when shooting has been called. Our range safety guide explains why.
Step 3: Hook and grip
The hook (recurve and traditional)
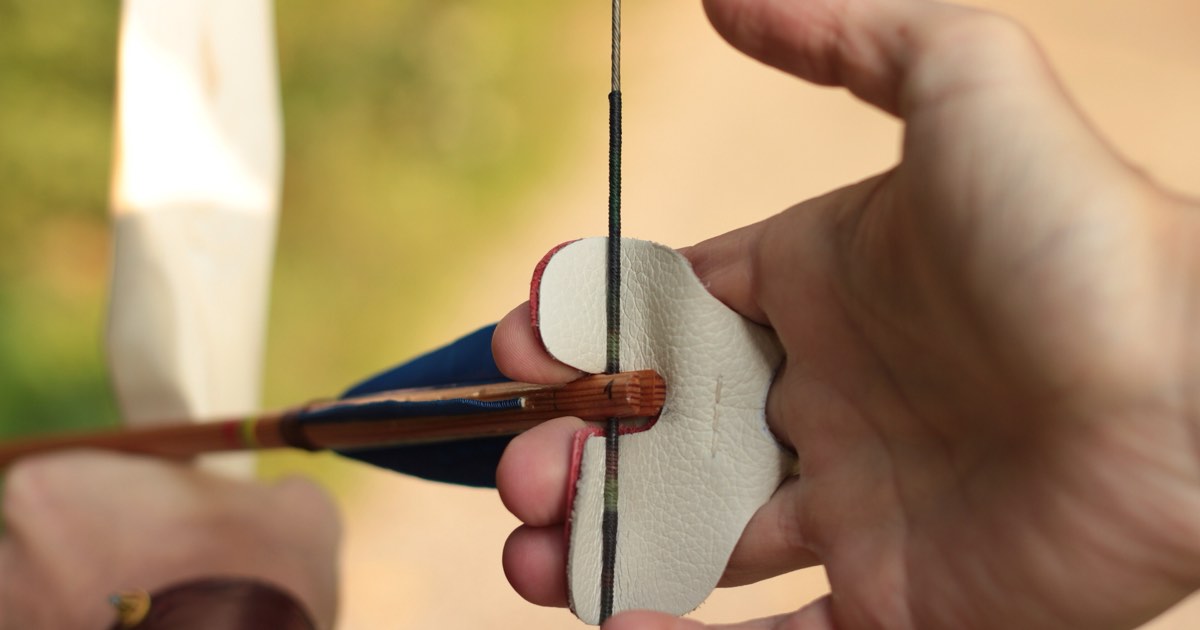
Place three fingers on the string: the index finger above the arrow and the middle and ring fingers below it, known as split-finger or Mediterranean draw. Some archers, especially barebow and beginners using a "three under" draw, put all three fingers below the arrow.
- Hook the string in the first joint of the fingers, where the finger creases.
- Keep the back of the hand flat and relaxed. The fingers hold the string; the wrist and forearm stay loose.
- A finger tab protects the fingers and gives a smoother release.
The grip
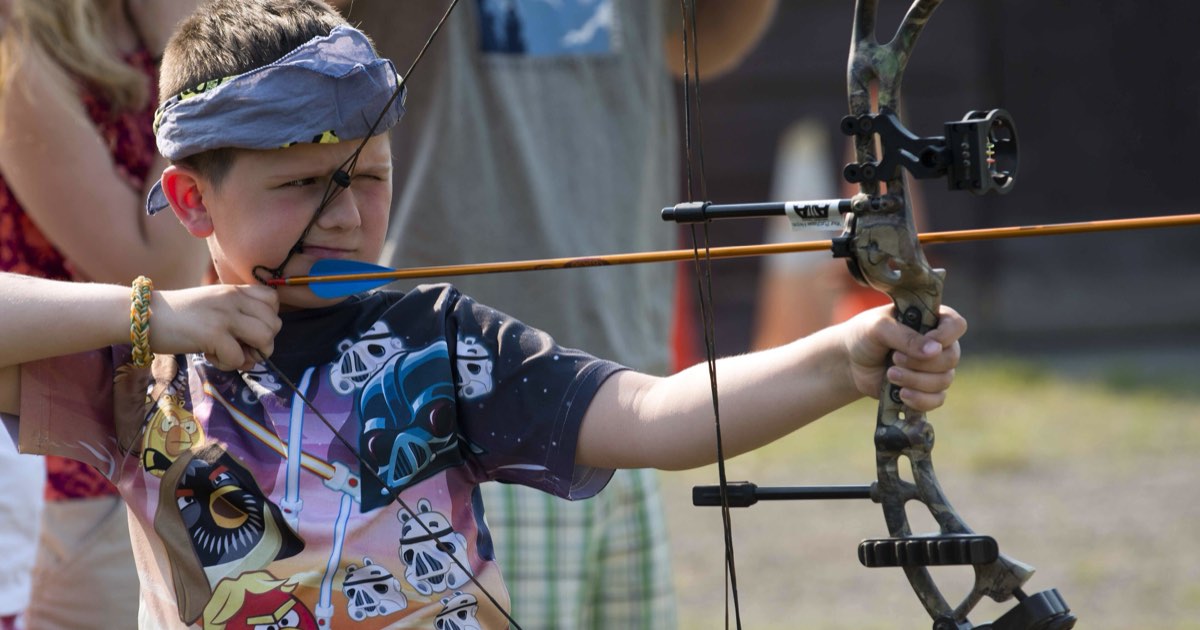
Place the bow in the "V" between thumb and index finger, with the pressure on the pad of the thumb, not the palm. The knuckles sit at roughly a 45-degree angle to the riser.
- The hand should push the bow, not grip it. Many target archers use a finger sling or wrist sling so that the bow can fall forward after the shot without being caught.
- Squeezing the grip twists the bow at release and sends arrows left or right.
Compound archers: clip the release aid onto the D-loop instead of hooking the string. The grip principle is identical.
Step 4: Set
Before lifting the bow, set the posture you will keep throughout the shot.
- Turn your head toward the target and keep it upright, not tilted forward or back.
- Let your shoulders settle down and relaxed. Raised shoulders are the most common tension fault.
- Stand tall with the chest down, not puffed out.
- Your bow arm is out of the path of the string.
Step 5: Set-up
Raise the bow toward the target with the bow arm, letting the drawing arm follow. Some archers begin to draw a small amount during the set-up, so that the drawing arm is already in line when the main draw begins.
- Raise the bow to target height, not above it. Lifting the bow high and drawing as it comes down sends arrows over the backstop if released accidentally.
- The bow arm should be straight but not locked, with the elbow rotated slightly so that its inside faces away from the string.
Step 6: Draw
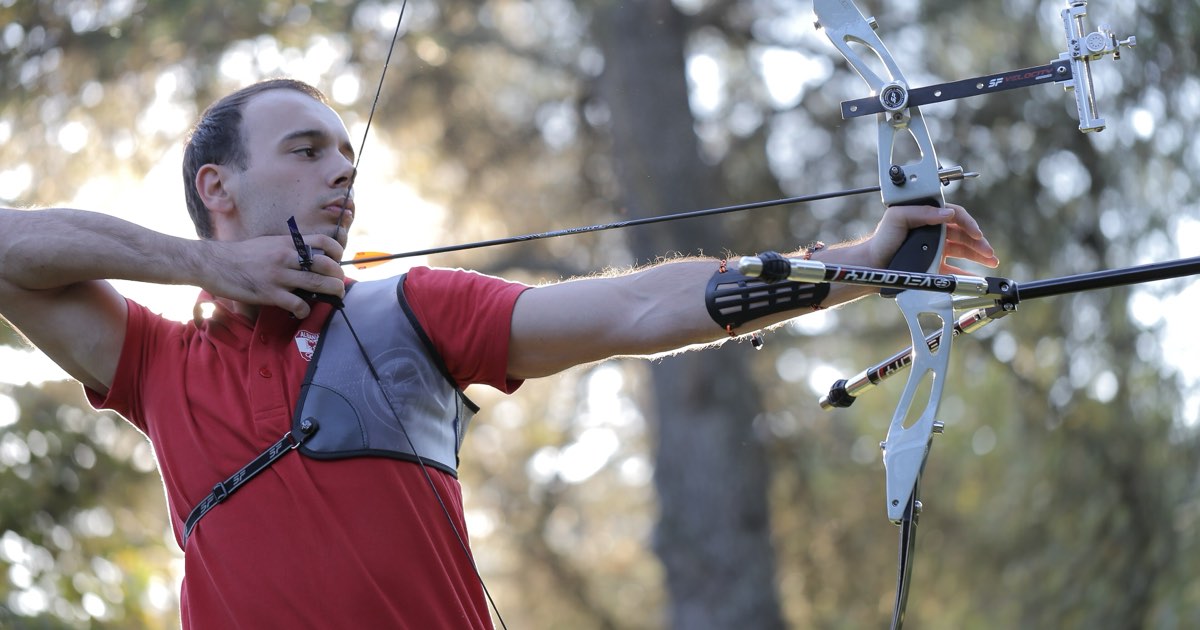
Pull the string back to your face in a smooth, straight line.
- Use your back muscles. Think of moving your drawing shoulder blade toward your spine, rather than pulling with the hand or biceps.
- Keep the drawing hand close to the line of the arrow.
- Draw at a steady pace. Jerky draws make anchor placement inconsistent.
If you cannot draw smoothly without lifting the bow skyward or shaking, your draw weight is too high. See our guide to choosing a first recurve.
Step 7: Anchor
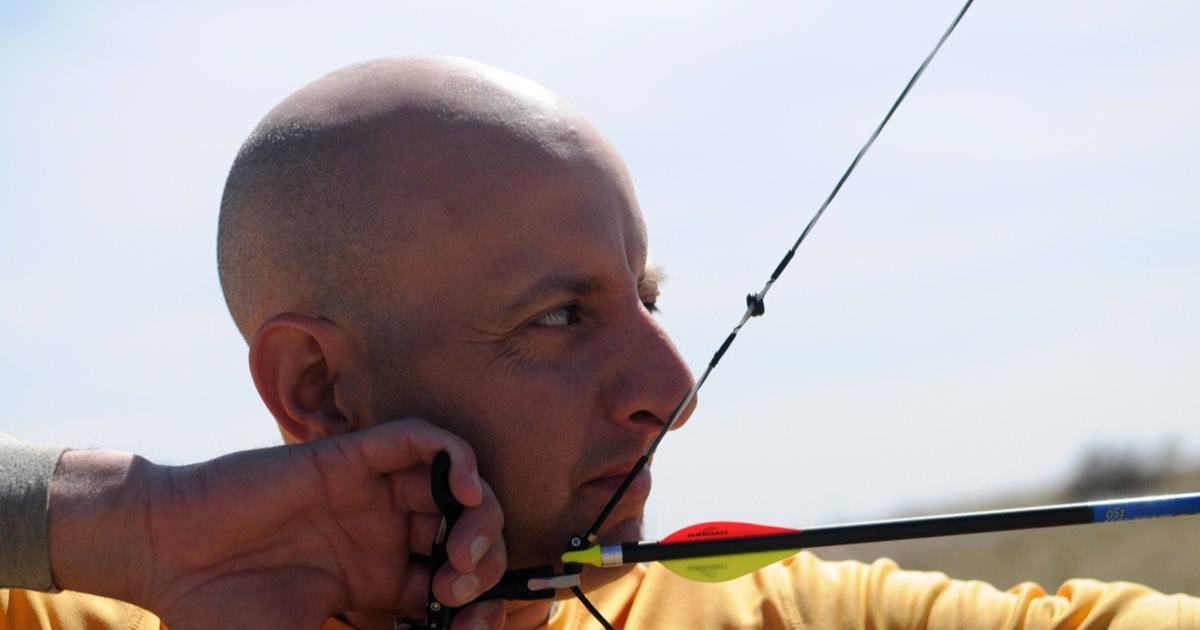
The anchor is where your drawing hand meets your face at full draw. It works like the rear sight on a rifle: if it moves, the arrow moves.
| Style | Typical anchor |
|---|---|
| Olympic recurve | Index finger under the jaw, string touching the centre of the chin and the tip of the nose |
| Beginner and barebow | Index finger in the corner of the mouth (NTS and NASP teach this for beginners) |
| Compound with release | Hand behind the jaw, string touching the nose, eye looking through the peep sight |
Whatever anchor you use, keep it identical. Check the same two or three contact points every shot, for example jaw, chin and nose.
Step 8: Transfer
Once at anchor, the load shifts from the arms to the back muscles. The drawing elbow moves slightly further round behind the line of the arrow, and the hand stays settled at the face.
This step is easy to skip and is the source of many problems. If the elbow stays out to the side, the archer is holding the bow with the arm and fingers, and the release will be inconsistent.
Step 9: Expand and aim
Now aim, either with a sight, by reference to the arrow point (barebow), or instinctively. At the same time, keep pulling: maintain a slow, continuous expansion through the back.
- Let the sight pin or point float on the gold. Some movement is normal; trying to freeze it causes tension and target panic.
- Do not stop moving. Archers who stop expanding at full draw tend to "collapse", letting the string creep forward before release.
- Recurve archers with a clicker expand until the clicker drops off the arrow; the click is the signal to release.
Step 10: Release
The release should be a result of the expansion, not a separate action.
- Fingers: relax the hook. The string pushes the fingers out of the way. Do not open the fingers deliberately or pluck the string away from the face.
- Release aid: pull through the shot until the release fires. With an index-finger trigger, squeeze it slowly as you continue to pull; with a hinge or back-tension release, the release fires from the rotation of your back.
The drawing hand should slide back along the jaw and neck after release, not fly out sideways.
Step 11: Follow-through and feedback
Hold your position until the arrow lands.
- The bow arm stays up and pointed at the target. Dropping it to watch the arrow is called peeking, and it starts before the arrow has left the bow.
- The drawing hand finishes near the shoulder or behind the neck.
- Then review: did that shot feel the same as the good ones? Which step was different?
That feedback is what makes practice productive. Our practice plan shows how to structure it.
Common faults and how to fix them
| Fault | What it looks like | Typical cause | Fix |
|---|---|---|---|
| Plucking | Drawing hand flies away from the face at release | Opening the fingers instead of relaxing | Blank bale shots focusing on a relaxed release |
| Collapsing or creeping | String drifts forward before release | Stopped expanding; arm doing the work | Practise transfer and continuous expansion |
| Gripping the bow | Arrows left and right | Squeezing the riser | Use a sling, keep fingers loose |
| Dropping the bow arm | Low arrows | Peeking at the target | Hold the follow-through until the arrow lands |
| Inconsistent anchor | Vertical spread in groups | Anchor points changing | Pick two or three contact points and check them every shot |
| Raised shoulder | Tension, bow arm string slap | Drawing with the arm | Set the shoulders down before set-up |
| Overbowed | Shaking, sky-drawing | Draw weight too high | Use lighter limbs while form develops |
Breathing
Most coaches teach a simple pattern: breathe in during set-up, let roughly half the breath out as you draw, and hold relaxed through anchor, aim and release. Do not hold your breath for a long time; if the shot is taking too long, let down and start again.
When to let down
Letting down means returning slowly to rest without releasing. It is a skill, not a failure. Let down if:
- the anchor does not feel right,
- the aim will not settle,
- you notice tension creeping in, or
- anything distracts you.
Bring the bow down slowly, pointed at the ground in front of the target, and start the sequence again from the set step.
Compound archers: what changes
| Step | Recurve | Compound |
|---|---|---|
| Hook | Three fingers and a tab | Release aid clipped to a D-loop |
| Draw | Weight increases to full draw | Weight peaks then drops (let-off); draw to the wall |
| Anchor | Under the chin or corner of mouth | Hand behind the jaw, eye through the peep |
| Aim | Sight pin or point of aim | Scope and peep alignment, level bubble |
| Release | Relax the fingers | Squeeze the trigger or rotate a hinge release while pulling |
The principles are the same: back tension, a consistent anchor, a relaxed bow hand, and follow-through.
Frequently asked questions
How long does it take to learn good form?
Most archers can shoot safely and consistently at short distance after a beginner course of a few weeks. Refining form is ongoing; even elite archers work on the same steps every season.
Should I learn with or without a sight?
Many coaches start beginners without a sight so that they concentrate on stance, anchor and release. A sight can be added once form is consistent.
Why do my arrows go left?
For a right-handed archer, common causes are gripping the bow, plucking the string, an anchor that drifts, or arrows that are too stiff. Check form first, then check arrow spine with our arrow selection guide.
Can I learn archery form from articles and videos alone?
You can learn the steps, but a coach or a video of yourself is the only way to see what you are actually doing. A few lessons at a club early on will save months of fixing habits later.
Sources
- The National Training System: Steps of Shooting – Rapids Archery JOAD
- NTS Steps for Success Using a Recurve Bow – Santa Cruz Archery Lessons
- National Training System – Kennesaw Archery Club
- 11 Steps to Archery Success – NASP via New Jersey Fish & Wildlife
- Six Basic Steps for Shooting – Bowhunter Ed
Related articles
 Training
Archery Practice Plan: 10 Drills and a Weekly Routine
A structured archery practice plan: arrows per session, warm-ups, 10 proven drills from blank bale to pressure games, weekly routines and a practice log.
March 20, 2025 · 7 min read
 Training
Target Panic in Archery: Symptoms, Causes and How to Fix It
Target panic explained: symptoms like freezing off target and snap shooting, what causes it, a self-test, and a step-by-step recovery plan for any bow.
February 19, 2025 · 8 min read
 Training
Archery Draw Length: How to Measure It and Why It Matters
How to measure archery draw length with the wingspan method or at full draw, what the AMO standard means, and how it affects bow size, draw weight, and arrows.
Updated February 6, 2025 · 8 min read