
Parts of a Recurve Bow: Diagram and Terms
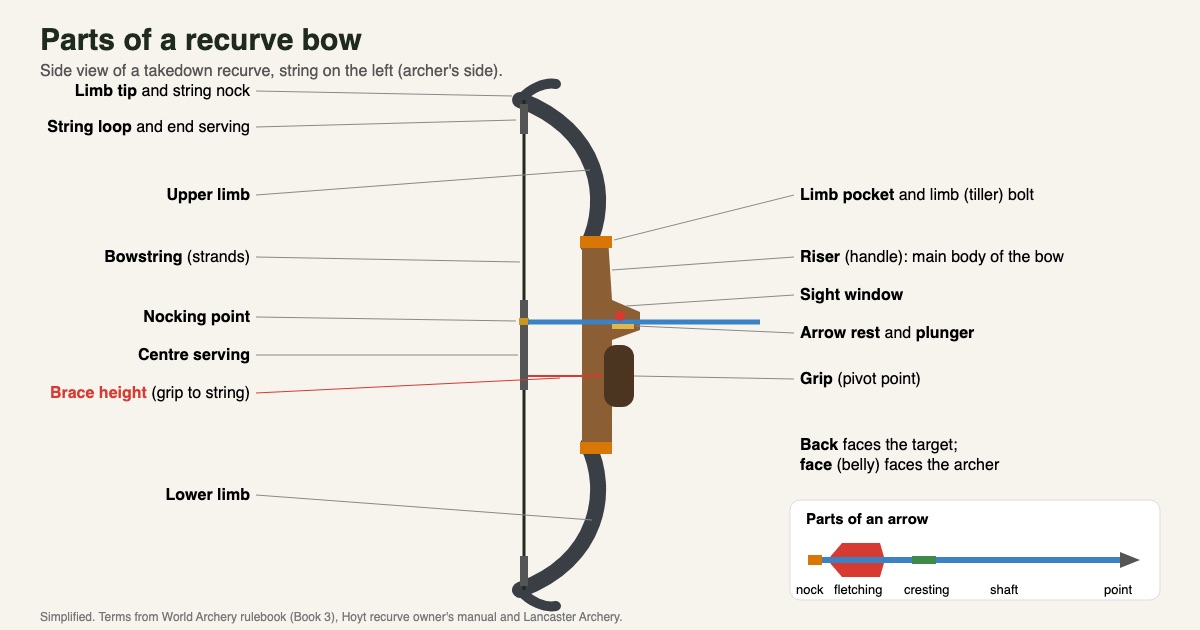
A labelled diagram of the parts of a recurve bow: riser, limbs, limb bolts, sight window, rest and plunger, plus the bowstring, measurements and arrow parts.

By Archery Insider Editorial Team
· 9 min read
In this article
If you are new to archery, the names for the parts of a recurve bow can feel like a foreign language: riser, limb pockets, tiller bolts, serving, nocking point. Knowing them makes it much easier to follow coaching, set up your bow and talk to an archery shop.
This guide labels every main part of a recurve bow in one diagram, explains what each part does, covers the bowstring and the arrow, and lists the key measurements you will hear about. Definitions come from World Archery's rulebook, Hoyt's recurve manual and Lancaster Archery.
The recurve bow at a glance
World Archery's rulebook describes a bow as "an instrument consisting of a handle/riser and grip… and two flexible limbs, each ending in a tip with a string nock. The bow is braced for use by a single string attached directly between the two string nocks." That's the whole bow in one sentence. The diagram above shows where each part sits.
The bow: riser, limbs and fittings
Riser
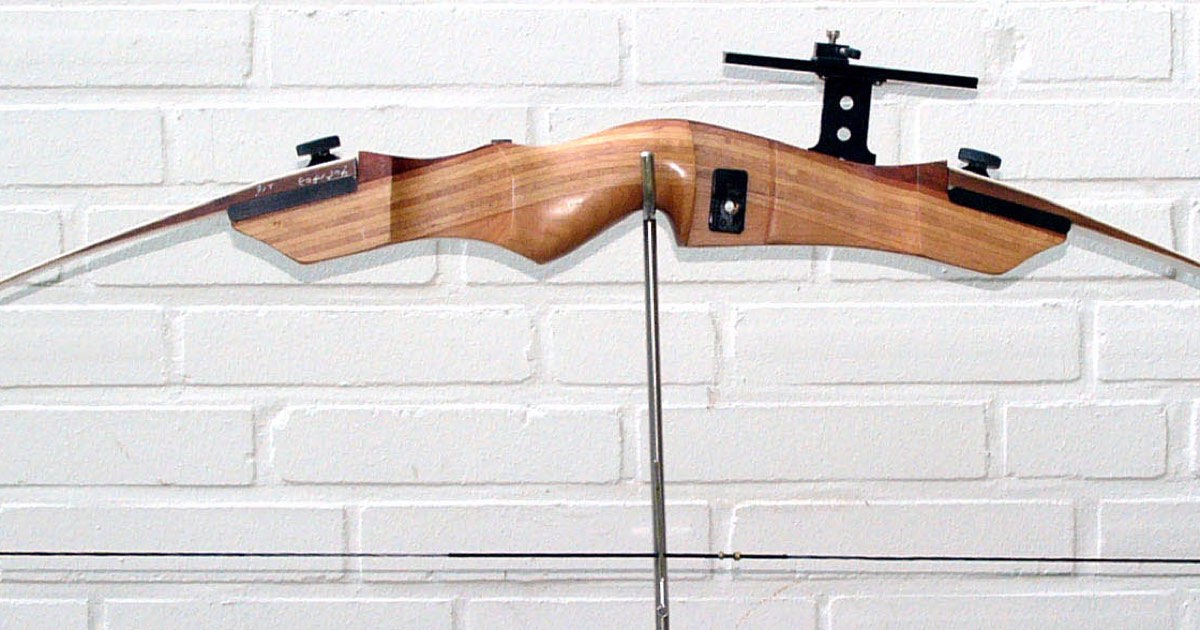
Lancaster describes the riser as "the main body of the bow." It is the central section you hold, and everything else attaches to it. On a takedown recurve the riser is often aluminium, carbon or wood. Hoyt's manual calls it the handle.
Grip
The grip is the part of the riser your bow hand holds. Its deepest point is the pivot point, the reference for measuring brace height and draw length.
Sight window
Lancaster: the sight window is "where the riser is cutout and allows for aiming and viewing of your target." The cut-out lets the arrow sit close to the centre of the bow.
Shelf, arrow rest and plunger
Below the sight window is the shelf. The arrow rest sits above it; Archery 360 says it "holds and guides the arrow as it leaves the bow." Olympic-style recurves also have a plunger (pressure button), a spring-loaded button the arrow rests against. Hoyt's diagram labels the "plunger hole(s)" in the riser. Our arrow rests guide covers the options, including shooting directly off the shelf.
Limbs
The limbs are the flexible arms that store energy. Archery 360 says they "generate the bow's power when bending in unison as you draw the bowstring." There is an upper limb and a lower limb. On a recurve, the limb tips curve away from the archer, which gives the bow its name.
Limb pockets and limb (tiller) bolts
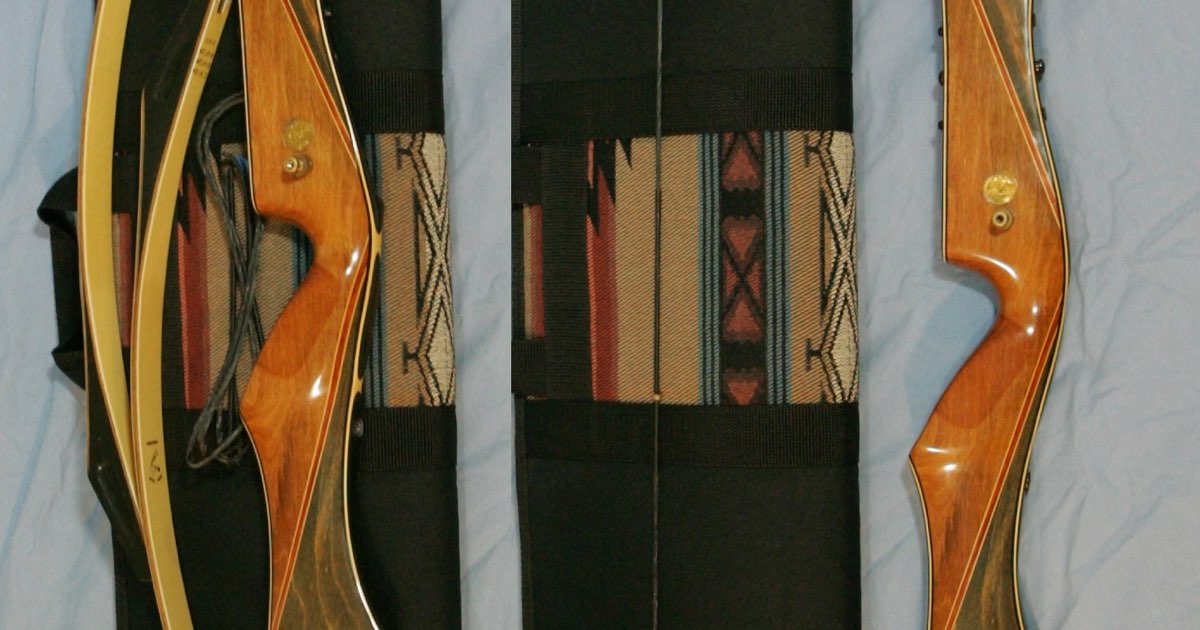
On a takedown recurve, the limbs slot into limb pockets on the riser and are held by limb bolts, which Hoyt calls "weight/tiller adjustment bolts." Lancaster explains that limb bolts are "used to adjust draw weight, change tiller height, balance your bow, and tune arrow flight." Some risers also have a locking screw and alignment adjustments.
Limb tips and string nocks
Each limb ends in a tip with a string nock: the groove where the string loop sits.
Back and face
Hoyt's diagram labels the back of the bow, which faces the target, and the face (or belly), which faces the archer.
Takedown, one-piece and limb fittings
A takedown recurve comes apart into a riser and two limbs, which makes it easier to transport and lets you change limbs as you get stronger. A one-piece recurve is built as a single unit. Many takedown risers use a common limb-fitting standard so limbs from different makers fit; others use their own fitting. We cover the differences in more detail in a separate guide. Our Samick Sage review is an example of a popular beginner takedown.
Parts of a recurve bowstring
World Archery's rules describe the string: "A bowstring may be of multi-coloured strands and serving. It may have a centre serving to accommodate the drawing fingers and one or two nocking points… At each end of the bowstring, there is a loop that is placed in the string nocks of the bow when braced."
- Strands: the many fibres twisted together to make the string.
- Loops: one at each end, fitted into the string nocks.
- End serving: thread wrapped around the loops to protect them.
- Centre serving: thread wrapped over the middle of the string, where your fingers and the arrow nock sit. Lancaster describes serving as "thin material wound around the shoot strands that protect the string."
- Nocking point: a marker (brass nock set or tied thread) showing where the arrow nock goes.
Hoyt notes that a recurve string "is approximately three inches shorter than the bow length." Our guides to how long bow strings last and waxing a bowstring cover string care.
Key measurements
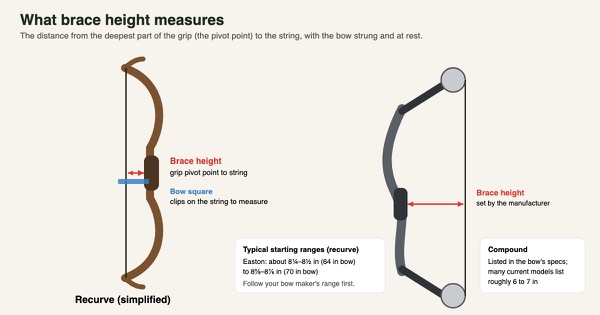
- Brace height: Hoyt defines it as "the perpendicular distance from the bowstring to the pivot point of the handle." See our brace height guide.
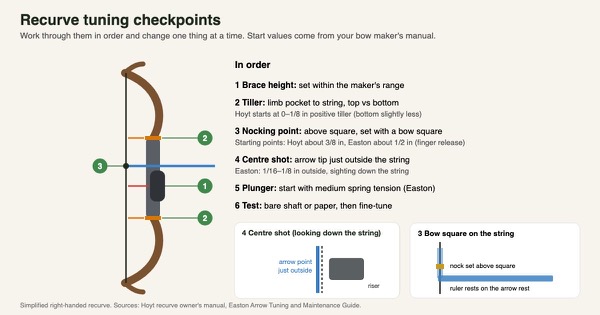
- Tiller: the difference between the distances from each limb pocket to the string, measured at Hoyt's "tiller measurement point." Our recurve tuning guide explains how to set it.
- Bow length: Hoyt measures it as "the distance from the tip of the top limb to the tip of the bottom limb of an unstrung bow with the tape following the limbs."
- Draw weight marking: Hoyt says "the weight marked on the limb is measured at a 28" standard A.T.A. (Archery Trade Association) draw length," and advises you to "add or subtract approximately two pounds for each inch your draw length is over or under the 28" standard." See our draw weight vs draw length guide.
- Draw length: how far you draw the string; see how to measure your draw length.
Accessories on an Olympic recurve
Olympic-style recurves carry extra accessories that a basic recurve doesn't:
- Sight: a movable aperture or pin mounted on the riser.
- Clicker: Archery 360 says it "clicks when the arrow is pulled to full draw." World Archery allows "one draw check indicator, audible, tactile, and/or visual," and Hoyt's diagram shows a "clicker mounting."
- Stabilisers: a long front rod and side rods; see our stabilizer guide.
- Plunger and adjustable rest.
Barebow and traditional recurves leave most of these off; our barebow guide explains what's allowed.
Parts of an arrow
World Archery: "An arrow consists of a shaft with a tip (point), nock, fletching, and, if desired, cresting."
- Point (tip): the front of the arrow.
- Shaft: the main body, made of aluminium, carbon or wood.
- Fletching: vanes or feathers at the back that steer the arrow; see feathers vs vanes.
- Nock: the slotted end that clips onto the string.
- Cresting: coloured bands that identify the archer's arrows.
Our arrow guide explains spine, length and weight.
Left-handed and right-handed recurves
Recurves are made in right-hand and left-hand versions. A right-handed bow is held in the left hand and drawn with the right, with the sight window, rest and plunger on the left side of the riser. A left-handed bow is the mirror image. Choose by the hand you draw the string with and, ideally, your dominant eye; a coach or shop can help you check.
Recurve vs longbow parts
A longbow has the same basic parts (handle, limbs, tips, string and nocking point), but it is simpler. Its limbs don't curve away at the tips, and many traditional longbows have little or no sight window, shooting off the hand or a small shelf. Our longbow vs recurve comparison explains how the two shoot differently.
Parts to inspect regularly
Knowing the parts makes it easier to check your bow before each session:
- Limbs: look for cracks, splinters, lifting layers or twist.
- Limb pockets and bolts: check the limbs are seated and the bolts are within the maker's limits.
- String: look for broken strands, fuzz and gaps in the serving.
- Nocking point: check it hasn't moved or loosened.
- Arrow rest and plunger: check the rest arm isn't bent or worn and the plunger moves freely.
- Arrows: check nocks, fletching and shafts for damage.
If anything looks damaged, don't shoot the bow until it has been checked.
Glossary table
| Part | What it does | Learn more |
|---|---|---|
| Riser | Main body of the bow; holds everything else | First recurve guide |
| Grip and pivot point | Where you hold the bow; reference for measurements | Brace height guide |
| Sight window | Cut-out for aiming and arrow clearance | Arrow rests guide |
| Shelf and arrow rest | Support the arrow | Arrow rests guide |
| Plunger | Cushions and fine-tunes the arrow's sideways movement | Recurve tuning guide |
| Limbs | Store and release energy | Draw weight guide |
| Limb pockets and bolts | Hold limbs; adjust draw weight and tiller | Recurve tuning guide |
| Limb tips and string nocks | Hold the string loops | Stringing guide |
| String loops and serving | Attach and protect the string | String life guide |
| Nocking point | Locates the arrow on the string | Recurve tuning guide |
Learning the parts of your bow
Advantages
- Makes coaching and setup instructions easier to follow
- Helps you talk to a shop and buy the right parts
- Helps you spot wear and damage
Trade-offs
- Some terms differ between makers and countries
- Olympic add-ons can make bows look more complex than they are
You can browse takedown recurve bows or recurve bow strings on Amazon.
Frequently asked questions
What are the parts of a recurve bow called?
The main parts are the riser, grip, sight window, shelf, arrow rest, plunger, limbs, limb pockets, limb bolts, limb tips and string nocks, plus the bowstring.
What is the riser on a recurve bow?
The central handle section that you hold and that the limbs and accessories attach to.
What are the parts of a recurve bow string?
The strands, end loops, end serving, centre serving and nocking point.
What is a nocking point?
A marker on the string, such as a brass nock set, that shows where to clip the arrow nock so it sits in the same place every shot.
What is brace height?
The distance from the string to the pivot point of the grip when the bow is strung and at rest.
Which way does a recurve limb face?
The back of the bow faces the target and the face (belly) faces the archer. The limb tips curve away from the archer.
What is the difference between a takedown and one-piece recurve?
A takedown splits into a riser and two limbs; a one-piece is a single unit.
What do the limb bolts do on a recurve?
On takedown recurves, the limb (tiller) bolts adjust draw weight and tiller within the maker's limits. Hoyt says the bolt should never go above flush with the riser and needs at least six threads engaged.
Related articles
 Guides
How to Choose Your First Recurve Bow: A Beginner's Guide
How to choose a first recurve bow: takedown vs one-piece, draw weight, bow length for your draw length, riser types, eye dominance, and essential accessories.
Updated February 6, 2025 · 11 min read
 Training
How to Tune a Recurve Bow: Nock Point, Tiller, Plunger
How to tune a recurve bow step by step: brace height, tiller, nocking point with a bow square, centre shot, plunger tension, and testing with bare shafts.
October 23, 2026 · 11 min read
 Gear
Brace Height Explained: What It Does and How to Set It
What brace height is, how to measure it, recommended ranges for recurves and longbows, compound brace height, and how it affects draw weight, speed and spine.
October 22, 2026 · 9 min read