
How to Use a Bow Sight Tape and Make Sight Marks
How bow sight tapes work, whether they're universal, three ways to get the right tape, how to verify marks at every distance, and how to fix marks that drift.

By Archery Insider Editorial Team
· 9 min read
In this article
A single-pin slider sight is only as good as its yardage tape. The tape is the strip of numbers beside the sight's indicator needle: set the needle to 37 yards and the pin should be right for 37 yards. Get the tape right and you can aim accurately at any distance in your range. Get it wrong and your arrows will hit high or low at the distances in between your practice marks.
This guide explains how sight tapes work, whether they're universal, three ways to get the right tape for your bow, how to verify it, and how to fix marks that drift.
What a sight tape is and how it works
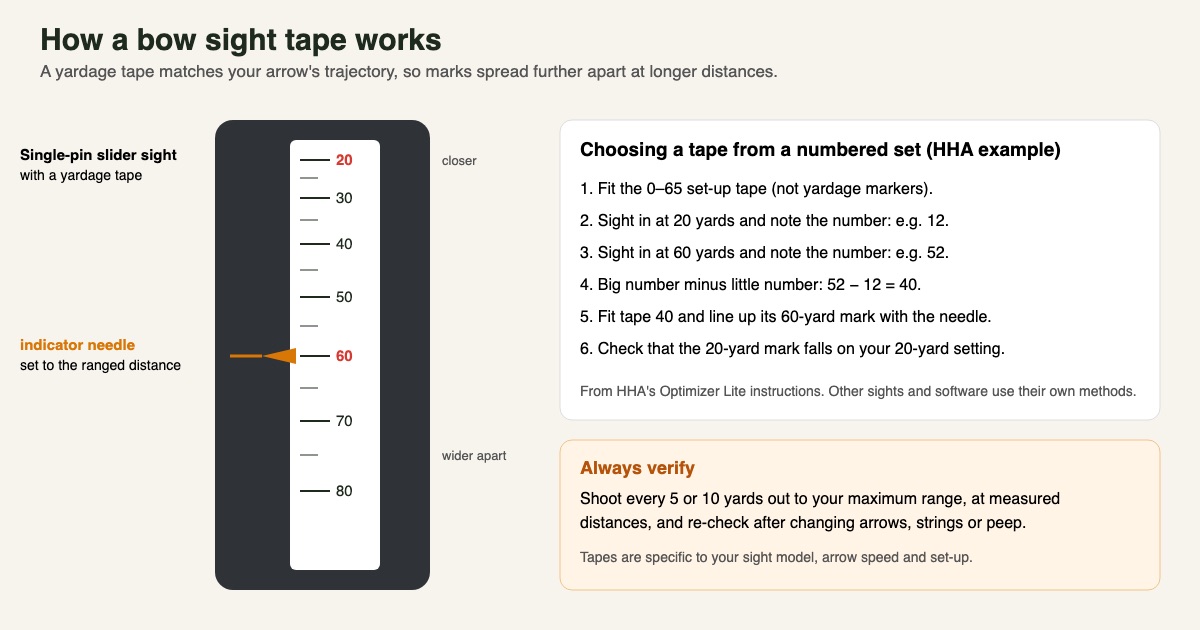
An arrow doesn't fly in a straight line; it drops in a curve, and the drop increases with distance. So the sight has to move a little between 20 and 30 yards, more between 50 and 60, and more again beyond that. A sight tape is printed with that spacing: yardage marks close together at short range and wider apart at long range, matched to how your arrow drops.
The spacing depends on your arrow speed (faster arrows drop less, so marks are closer together) and on your sight geometry: the distance from your eye or peep to the pin, and from the peep to the arrow. That's why one tape can't fit every bow.
Are sight tapes universal?
No. A tape is specific to:
- The sight model, because each has its own scale and pin travel.
- Your arrow speed and weight.
- Your peep-to-pin and peep-to-arrow distances, which depend on your draw length, anchor and sight extension.
Swapping a tape between bows, sights or arrow setups will give wrong marks at some distances.
Before you start
- Level the sight so the bubble is centred when the bow is upright.
- Use a consistent anchor and peep position; our kisser button and peep guide explains why.
- Tune the bow first, so arrows fly cleanly; see our paper tuning guide.
- Use measured distances, ideally with a rangefinder; see how to choose a bowhunting rangefinder.
- Pick a calm day and a safe range with a solid backstop at every distance you'll shoot.
- Use your hunting arrows, weighed and complete.
Method 1: choosing a tape from a numbered set
Many sights come with a set of tapes for different arrow speeds. HHA's Optimizer Lite instructions are a good example. The sight "comes complete with 43 different computer designed yardage tapes," numbered "from 16 (extremely fast bow) to 58 (moderately slow bow)." HHA says these are "accurate at all ranges (20-60 yards) within ½ inch."
HHA's method:
- Fit the set-up tape, which is numbered 0 to 65. HHA notes these numbers are not yardage markers; they're only used to select the right tape.
- Sight in at 20 yards and note the number under the needle.
- Sight in at 60 yards and note that number. HHA calls the 20- and 60-yard system "THE PREFERRED MOST ACCURATE system."
- Subtract. HHA's example: "52-12=40. BIG NUMBER MINUS LITTLE NUMBER EQUALS CORRECT TAPE."
- Fit the chosen tape, lining up its 60-yard marker under the needle; the 20-yard marker "will fall exactly where you marked your 20 yard setting."
HHA also offers a 20/40 system for anyone unable to shoot 60 yards. Other sight makers have their own procedures, so follow the instructions for your sight.
Method 2: printing a custom tape
Software can calculate a custom tape for your exact setup. goHUNT's walkthrough of Archer's Advantage lists the inputs: arrow components and weight, peak draw weight, draw length, the peep-to-arrow and peep-to-pin distances measured at full draw, and your chronograph speed. Precision Cut Archery offers a similar feature with configurable ranges and increments.
The key steps from these guides:
- Measure carefully. Weigh finished arrows (goHUNT says to match the software's weight) and measure your peep distances at full draw.
- Measure real arrow speed with a chronograph; see our IBO speed guide.
- Sight in at two distances. goHUNT describes setting the "top pin at 20 yards, bottom pin at 60 yards."
- Print at actual size. goHUNT says to print at "Actual Size" or "100%." Precision Cut says: "Ensure you print at a custom scale of 100% and do not select 'scale-to-fit' or 'fit-to-page'."
- Measure the printed scale before cutting it out, to confirm it printed correctly.
- Verify by shooting several distances before relying on it.
Method 3: marking a blank tape yourself
You can also build a tape from your own sight marks. Field & Stream's Jace Bauserman describes attaching a blank tape and spending time finding your "perfect zero" at your top distance, confirming it across several days, then moving to 40 and 60 yards. He notes that "dialing in at 60 yards should take you at least two days." Then choose or fill in the tape and verify every 5- and 10-yard increment.
Writing your own marks works, but marks between the distances you shot are only estimates until you check them.
Fitting the tape
- Clean the mounting area so the tape sticks flat and straight.
- Line it up carefully against the indicator needle at the distance you set it from (for example the 60-yard mark, in HHA's method).
- Press it down firmly along its length so it doesn't lift or shift.
- Fit any clear cover supplied with the sight to protect the tape from rain and wear.
- Mark a reference on the sight bar with a fine pen, so you can see if the tape or scale moves later.
Verifying the tape at every distance
Whatever method you use, verify the tape:
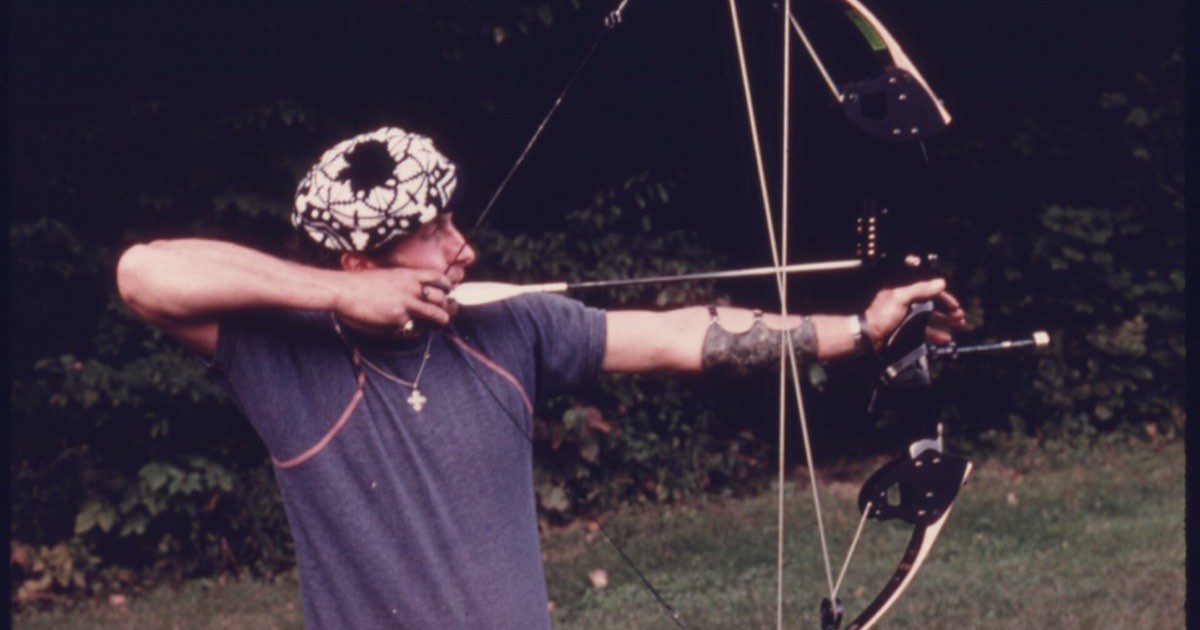
- Shoot groups at every 5 or 10 yards from your shortest to your longest distance.
- Note any distance where groups land consistently high or low.
- If one or two distances are off, check your form and arrows first, then consider a different tape.
- Re-check your marks in hunting conditions and at angles you'll shoot.
Our aiming guide explains how sights fit into the shot process.
Multi-pin sights: gaps instead of tapes
Multi-pin sights usually don't use a yardage tape. Instead, each pin is set for a distance (often 20, 30, 40 yards and beyond), and you aim between pins for distances in between, known as gapping. Some sights combine fixed pins with a movable housing. Our single-pin vs multi-pin comparison explains the trade-offs, and our Trophy Ridge React Pro review explains a sight that sets its pins from two sighted-in distances.

Sight marks for recurve and target archers
Target recurve archers usually don't use printed tapes. Instead, they keep a record of sight marks for each distance, often in metres for World Archery events, and mark them on the sight bar or in a notebook. The principle is the same: marks get further apart as distance increases, and they need checking whenever equipment changes.
Shooting uphill and downhill
A sight tape is set for level shots. On steep angles, the arrow's drop depends on the horizontal distance rather than the line-of-sight distance, so the ranged yardage can mislead you. Many bowhunting rangefinders offer an angle-compensated reading for this reason; our rangefinder guide explains it. Practise at angles you'll hunt and confirm where your arrows land before relying on the tape in steep country.
Keeping your marks accurate
A short routine keeps a tape reliable through a season:
- Shoot a few arrows at two or three distances each practice session, including your longest.
- Note any drift in a log, with the date and conditions.
- Check your peep and string if marks start moving.
- Re-verify after travel or any knock to the bow.
- Do a full check before each season and after any equipment change.
When to re-check your tape
- New arrows or different point or broadhead weights.
- New strings, or after strings stretch; see how long bow strings last.
- A moved peep or changed anchor.
- Changes in draw weight or draw length.
- Before every season, and after any knock to the sight.
Troubleshooting
| Problem | Likely causes | What to check |
|---|---|---|
| Short distances right, long distances off | Wrong tape, or wrong speed or arrow weight entered | Re-check chronograph speed and arrow weight; try the next tape |
| Long-range marks drift high or low over time | String stretch, peep movement, changed arrows | Re-check peep height, string and arrows |
| Groups left or right at long range | Sight not level, or bow canted | Level the sight; check the bubble on every shot |
| All marks off by the same amount | Sight moved or second axis needs adjusting | Re-zero at your top distance |
| Tape printed at the wrong size | Printer scaling | Re-print at 100% and measure the scale |
Using a sight tape
Advantages
- Accurate aiming at any distance in your range
- One uncluttered pin with a movable sight
- Easy to re-check and adjust
Trade-offs
- Specific to your sight, arrows and setup
- Needs careful setup and verification
- Must be re-checked after equipment changes
You can browse bow sight tapes or single-pin bow sights on Amazon.
Frequently asked questions
What is a sight tape on a bow?
A yardage scale fitted beside a movable sight's indicator, matched to your arrow's trajectory so the pin is set correctly at each distance.
How do bow sight tapes work?
They space yardage marks to match how your arrow drops, closer together at short range and further apart at long range.
Are sight tapes universal?
No. They depend on the sight model, your arrow speed and weight, and your sight geometry.
Can I make my own sight tape?
Yes, by marking a blank tape from your own sight-ins, or by printing a custom tape from software using your measurements.
Which distances do I need to shoot to pick a tape?
HHA's preferred method uses 20 and 60 yards, with a 20/40 option. Software often uses two distances too.
Why are my long-range marks off?
Usually a wrong tape, incorrect speed or arrow weight, string stretch, a moved peep or an unlevel sight.
Do I need a chronograph?
For printing a custom tape, accurate arrow speed helps. For choosing from a numbered set, sighting in at two distances is enough.
Can I use one tape for field points and broadheads?
Only if your broadheads and field points hit together. Tune your broadheads first, then confirm your marks with the heads you'll hunt with.
How often should I check my sight tape?
Check a few distances every practice session, do a full check before each season, and re-verify after any change to arrows, string, peep, draw weight or draw length.
Related articles
 Comparisons
Single-Pin vs Multi-Pin Bow Sights: Which Should You Choose?
Single-pin vs multi-pin bow sights compared: fixed pins vs sliders, speed in the field, long-range precision, low light, gap shooting, hybrids and scopes.
February 25, 2026 · 5 min read
 Reviews
Trophy Ridge React Pro Review: The 5-Pin Sight That Sets Its Own Pins
Trophy Ridge React Pro bow sight review: React Technology pin setting, .019 and .010 pins, tool-less micro-click adjustments, third axis and who it suits.
September 3, 2025 · 6 min read
 Training
How to Aim a Bow: Sights, Gap and Instinctive
How to aim a bow: eye dominance, anchor points, sights, gap shooting, string walking, face walking and instinctive aiming, with practice drills for each.
October 7, 2026 · 11 min read