
How to Sight In a Crossbow Scope, Step by Step
How to sight in a crossbow scope: safety, mounting, a 20-yard zero, multi-reticle and speed-dial scopes, broadhead checks and fixes for wandering groups.
By Archery Insider Editorial Team
· 9 min read

In this article
A crossbow is only as accurate as its scope is set. Out of the box, even a pre-mounted scope is rarely hitting exactly where the reticle points, and a small error at 20 yards becomes a big one at 40. Sighting in, or "zeroing", means adjusting the scope until your bolts hit where you aim at known distances.
This guide walks through safety, mounting, the zeroing sequence for the two common types of crossbow scope, confirming with broadheads, and fixing the problems that send bolts wandering.
Types of crossbow scope
Most crossbows come with a scope, but it helps to know what you have before you start.
| Type | How it works | Good to know |
|---|---|---|
| Multi-reticle (fixed) | Several lines or dots, each for a set distance at an assumed bolt speed | Simple; lines may not match your crossbow exactly |
| Speed-dial (adjustable) | Multi-reticle with a ring that adjusts the scope to your bolt speed | Lines can be matched closely to your setup |
| Red dot | Illuminated dot or dots with no magnification | Fast to use; less precise at longer range |
| Illuminated reticle | Lines or dots that light up, often red or green | Helps in low light; keep brightness low to avoid glare |
Magnification on crossbow scopes is usually modest, because most shots are at bowhunting distances. A clear view and a reticle you can see at dawn and dusk matter more than high power.
Before you start: crossbow safety
NRA Family's crossbow safety guide stresses: "Always keep your finger off the trigger, your hands and fingers under the flightdeck and out of the 'danger triangle.'" The string travels along the rail with enough force to badly injure a thumb or finger.
- Never dry-fire. Firing without a bolt "will almost surely destroy the crossbow and can be very dangerous to the shooter."
- Use only bolts and nocks the manufacturer specifies, at or above its minimum weight.
- Cock it correctly, with a rope cocker or crank as the manual describes, and keep the string centred.
- Unload safely. Fire a practice bolt into a target, use a decocking bolt, or use the crank's decocking procedure if it has one. Never simply release the string.
- Point it in a safe direction at all times, with a safe backstop behind the target.
What you need
- A target that stops crossbow bolts. Many foam targets are rated for crossbows; bag targets often are not, so check the rating.
- A stable rest: a shooting bench, bipod or shooting sticks. Scheels recommends a bench rest or shooting sticks to "reduce user error".
- A rangefinder or tape measure to set exact distances.
- Bolts identical to your hunting bolts, with field points matching your broadhead weight.
- The tool for the scope turrets (often a coin or the caps themselves) and the scope's manual.
Step 1: Mount and set up the scope
- Tighten the mount. Check that the rings and base screws are snug, following the manufacturer's torque guidance if given. A loose scope is the commonest cause of groups that wander.
- Set eye relief. With the crossbow shouldered in your shooting position, slide the scope until you see a full, clear picture without straining forward.
- Level the reticle. The horizontal lines should be level when the crossbow is level. A tilted reticle pushes long shots left or right.
- Focus the reticle. Look at a bright, plain background and turn the eyepiece until the reticle lines are crisp. If the reticle looks blurry, this is usually the fix.
- Set magnification (on variable scopes) to the power you will hunt with, and keep it there while zeroing.
Step 2: Rough check at 10 yards
Scheels suggests beginning "at a short distance of around 10 yards" to make sure you are on paper. Shoot one bolt with the top reticle. If it is far off, make a large correction now, so you do not miss the target entirely at 20 yards.
Step 3: Zero the top line at 20 yards
TenPoint's procedure for multi-line scopes starts with a target at "exactly 20 yards", using "the top horizontal line/dot".
- Shoot a group of three bolts with the same aim point. Use separate aiming spots, or pull each bolt, so you do not damage them.
- Find the centre of the group and compare it with your aim point.
- Adjust toward the error. On most crossbow scopes you turn the turrets in the direction you want the impact to move. Scheels: "If your shots hit high, adjust downward; if they hit left, adjust the windage right." Each turret is marked with its arrows; follow them.
- Shoot another group of three and repeat until the group centres on the bullseye.
Step 4a: Multi-reticle (fixed-speed) scopes
These scopes have several lines or dots below the crosshair, each calibrated for a farther distance at an assumed bolt speed. TenPoint's sequence:
- Decide your maximum hunting distance. If it is 40 yards, set up next at 30 yards; if it is 50 yards, set up at 40 yards.
- At that distance, shoot with the matching line. TenPoint uses "the second horizontal line/dot from the top" for 30 yards or "the third" for 40 yards, and adjusts until the group is centred.
- Re-check 20 yards with the top line. You may hit slightly high or low, but you must stay well inside the vital zone.
- Check your maximum distance with its line.
Because each scope is calibrated for one speed, the lines may not match your crossbow exactly. Write down where each line actually hits and treat that as your real yardage. TenPoint lists pre-calibrated speeds for its own scopes, such as 330 fps for its multi-line scope; other brands differ, so check the manual.
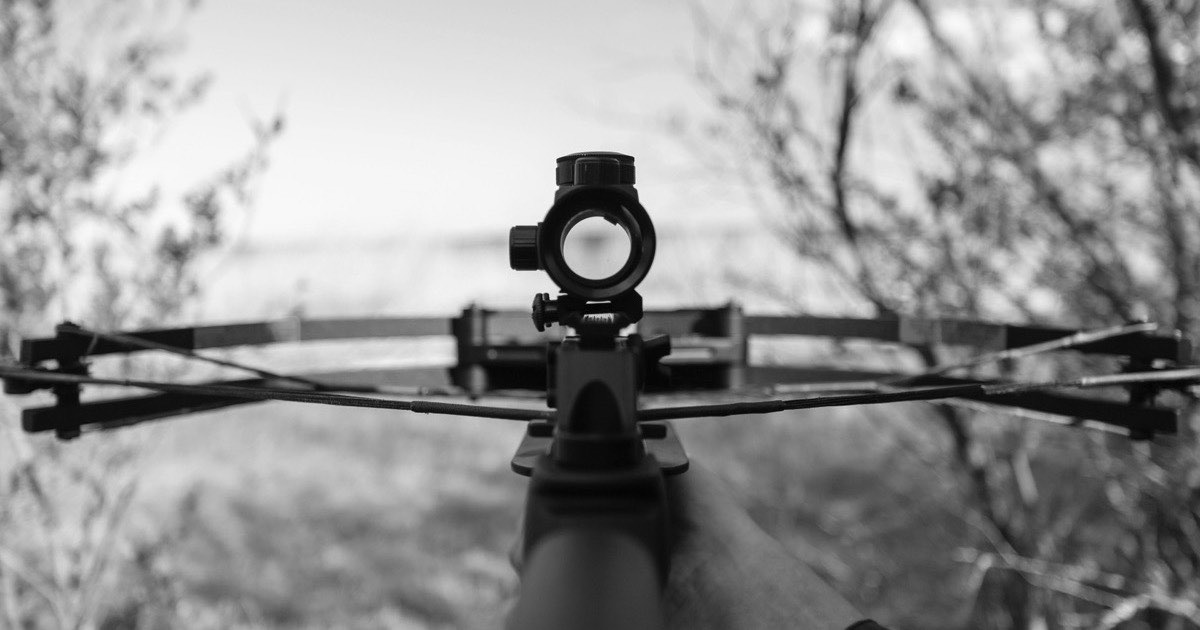
Step 4b: Speed-dial scopes
Speed-dial scopes let you match the reticle to your actual bolt speed. Deer & Deer Hunting's seven-step method:
- Find your bolt speed from the manufacturer or, better, by chronographing your crossbow with your hunting bolts.
- Set the speed dial to that speed.
- Set the target at exactly 20 yards.
- Shoot with the 20-yard reticle and make windage and elevation adjustments until bolts consistently hit the same spot. Replace the turret caps.
- Move the target to exactly 40 yards.
- Shoot with the 40-yard reticle and adjust only the speed dial: "If your arrow hit high, adjust the speed dial to a higher speed. If the arrow hit low, adjust the speed dial to a lower speed." Do not touch the elevation turret at this stage.
- Go back to 20 yards and confirm the 20-yard reticle still hits.
Step 5: Confirm with broadheads
Scheels recommends testing "with field points first, then confirm with broadheads matching hunting specifications." Broadheads, especially fixed blades, can fly differently. Shoot them into a broadhead-rated target at 20 and 30 yards. If they group in a different place from your field points:
- Check the bolt is straight and the broadhead is fully seated and aligned.
- Try spinning each broadhead-tipped bolt; wobble means a misaligned head or insert.
- Re-zero with broadheads if necessary. Your hunting setup is what counts.
Our fixed-blade vs mechanical broadhead comparison explains the differences in flight.
Troubleshooting
| Problem | Likely causes | What to try |
|---|---|---|
| Reticle looks blurry | Eyepiece not focused for your eye | Refocus the eyepiece against a bright, plain background |
| Groups wander or open up | Loose scope or rings; inconsistent cocking; mixed bolts | Tighten the mount; use a cocking device and keep the string centred; use matched bolts |
| Bolts hit left or right more at long range | Reticle tilted, or canting the crossbow | Level the scope; keep the crossbow upright when shooting |
| Lower lines hit high or low | Bolt speed differs from the scope's calibration | Note the real yardage for each line, or use a speed-dial scope |
| Broadheads hit apart from field points | Misaligned heads, bent bolts | Spin-test, replace damaged bolts, re-zero with broadheads |
| Zero shifts between sessions | Scope bumped, loose mount, string wear | Check screws, inspect the string and serving, re-check zero |
Practise after you zero
A zeroed scope is the start, not the finish. Once you are hitting at 20, 30 and 40 yards from a bench:
- Shoot from your hunting positions: seated in a blind, from a tree stand with the crossbow on a rail or shooting rest, and kneeling.
- Practise ranging and choosing the right reticle line quickly, so it becomes automatic.
- Shoot at 3D deer targets to practise aiming at the vital zone rather than a bullseye.
- Practise safe cocking, loading and unloading until you can do it without thinking, in low light and with gloves on.
- Shoot a single cold bolt at the start of each session to see where your first shot of the day goes.
Keep it zeroed
- Check your zero before every season and after travelling or dropping the crossbow.
- Inspect the string and cables for fraying, and wax the rail and string if the manual calls for it.
- Practise from hunting positions. Your zero from a bench is the starting point; shooting from a blind or stand reveals problems a bench hides.
- Know your limits. A crossbow is accurate, but bolts still drop and deer still move. Our shot placement guide covers where to aim.
Speed-dial scope vs fixed multi-reticle
Advantages
- Speed dial matches the reticle to your actual bolt speed
- Multi-reticle scopes are simple, with nothing to adjust in the field
Trade-offs
- Speed dial adds a setting that can be bumped
- Fixed multi-reticle lines may not match your bolt speed exactly
You can browse crossbow-rated targets and crossbow scopes on Amazon. Check that the target is rated for your crossbow's speed.
Frequently asked questions
What distance should I sight in a crossbow?
Start with a rough check at about 10 yards, then zero the top reticle at 20 yards. Check the lower reticles at 30 and 40 yards, or at the distances your scope is marked for.
How many shots should I take before adjusting the scope?
Shoot groups of three and adjust based on the centre of the group.
Why is my crossbow scope blurry?
Usually the eyepiece is not focused for your eye. Look at a bright, plain background and turn the eyepiece until the reticle is crisp.
Do I need to sight in with broadheads?
Yes, confirm with the broadheads you will hunt with. They can hit differently from field points.
Which way do I turn the scope turrets?
On most crossbow scopes you turn the turret in the direction you want the impact to move. Follow the arrows marked on your turrets and check your manual.
How often should I check my crossbow's zero?
Before every season, after travelling or dropping the crossbow, after changing bolts, points or the string, and any time your groups move. A quick three-bolt check at 20 yards before a hunt gives peace of mind.
Do I need to sight in a new crossbow if the scope came mounted?
Yes. Pre-mounted scopes are a starting point, not a guarantee. Bolt weight, your shooting position and small differences in mounting all change where bolts hit, so always zero it yourself before hunting.
Related articles
 Comparisons
Crossbow vs Compound Bow: Which Is Better for You?
Crossbow vs compound bow compared: how each works, speed and energy, weight, holding and follow-up shots, accuracy, learning curve, hunting rules and costs.
August 12, 2026 · 5 min read
 Reviews
CenterPoint Sniper Elite 385 Review: A Budget Crossbow Explained
CenterPoint Sniper Elite 385 review: 385 fps, 185 lb draw, 14-inch power stroke, 4x32 scope package, safety features, set-up, and who it suits.
Updated April 9, 2026 · 7 min read
 Guides
Can You Hunt Deer With a Bow? A Beginner's Guide
Yes, you can hunt deer with a bow. Learn the legal basics, which bows work, how hard it is, effective range, gear, shot placement and a first-season plan.
October 6, 2026 · 13 min read